Copyright © 2006 David B. Williams & Peter R. Webster
[Distributing copies of this tutorial online or offline is not permitted]
Project 9-SBm: BEGINNING NOTE ENTRY SKILLS
(Sibelius for Macintosh)
![]()
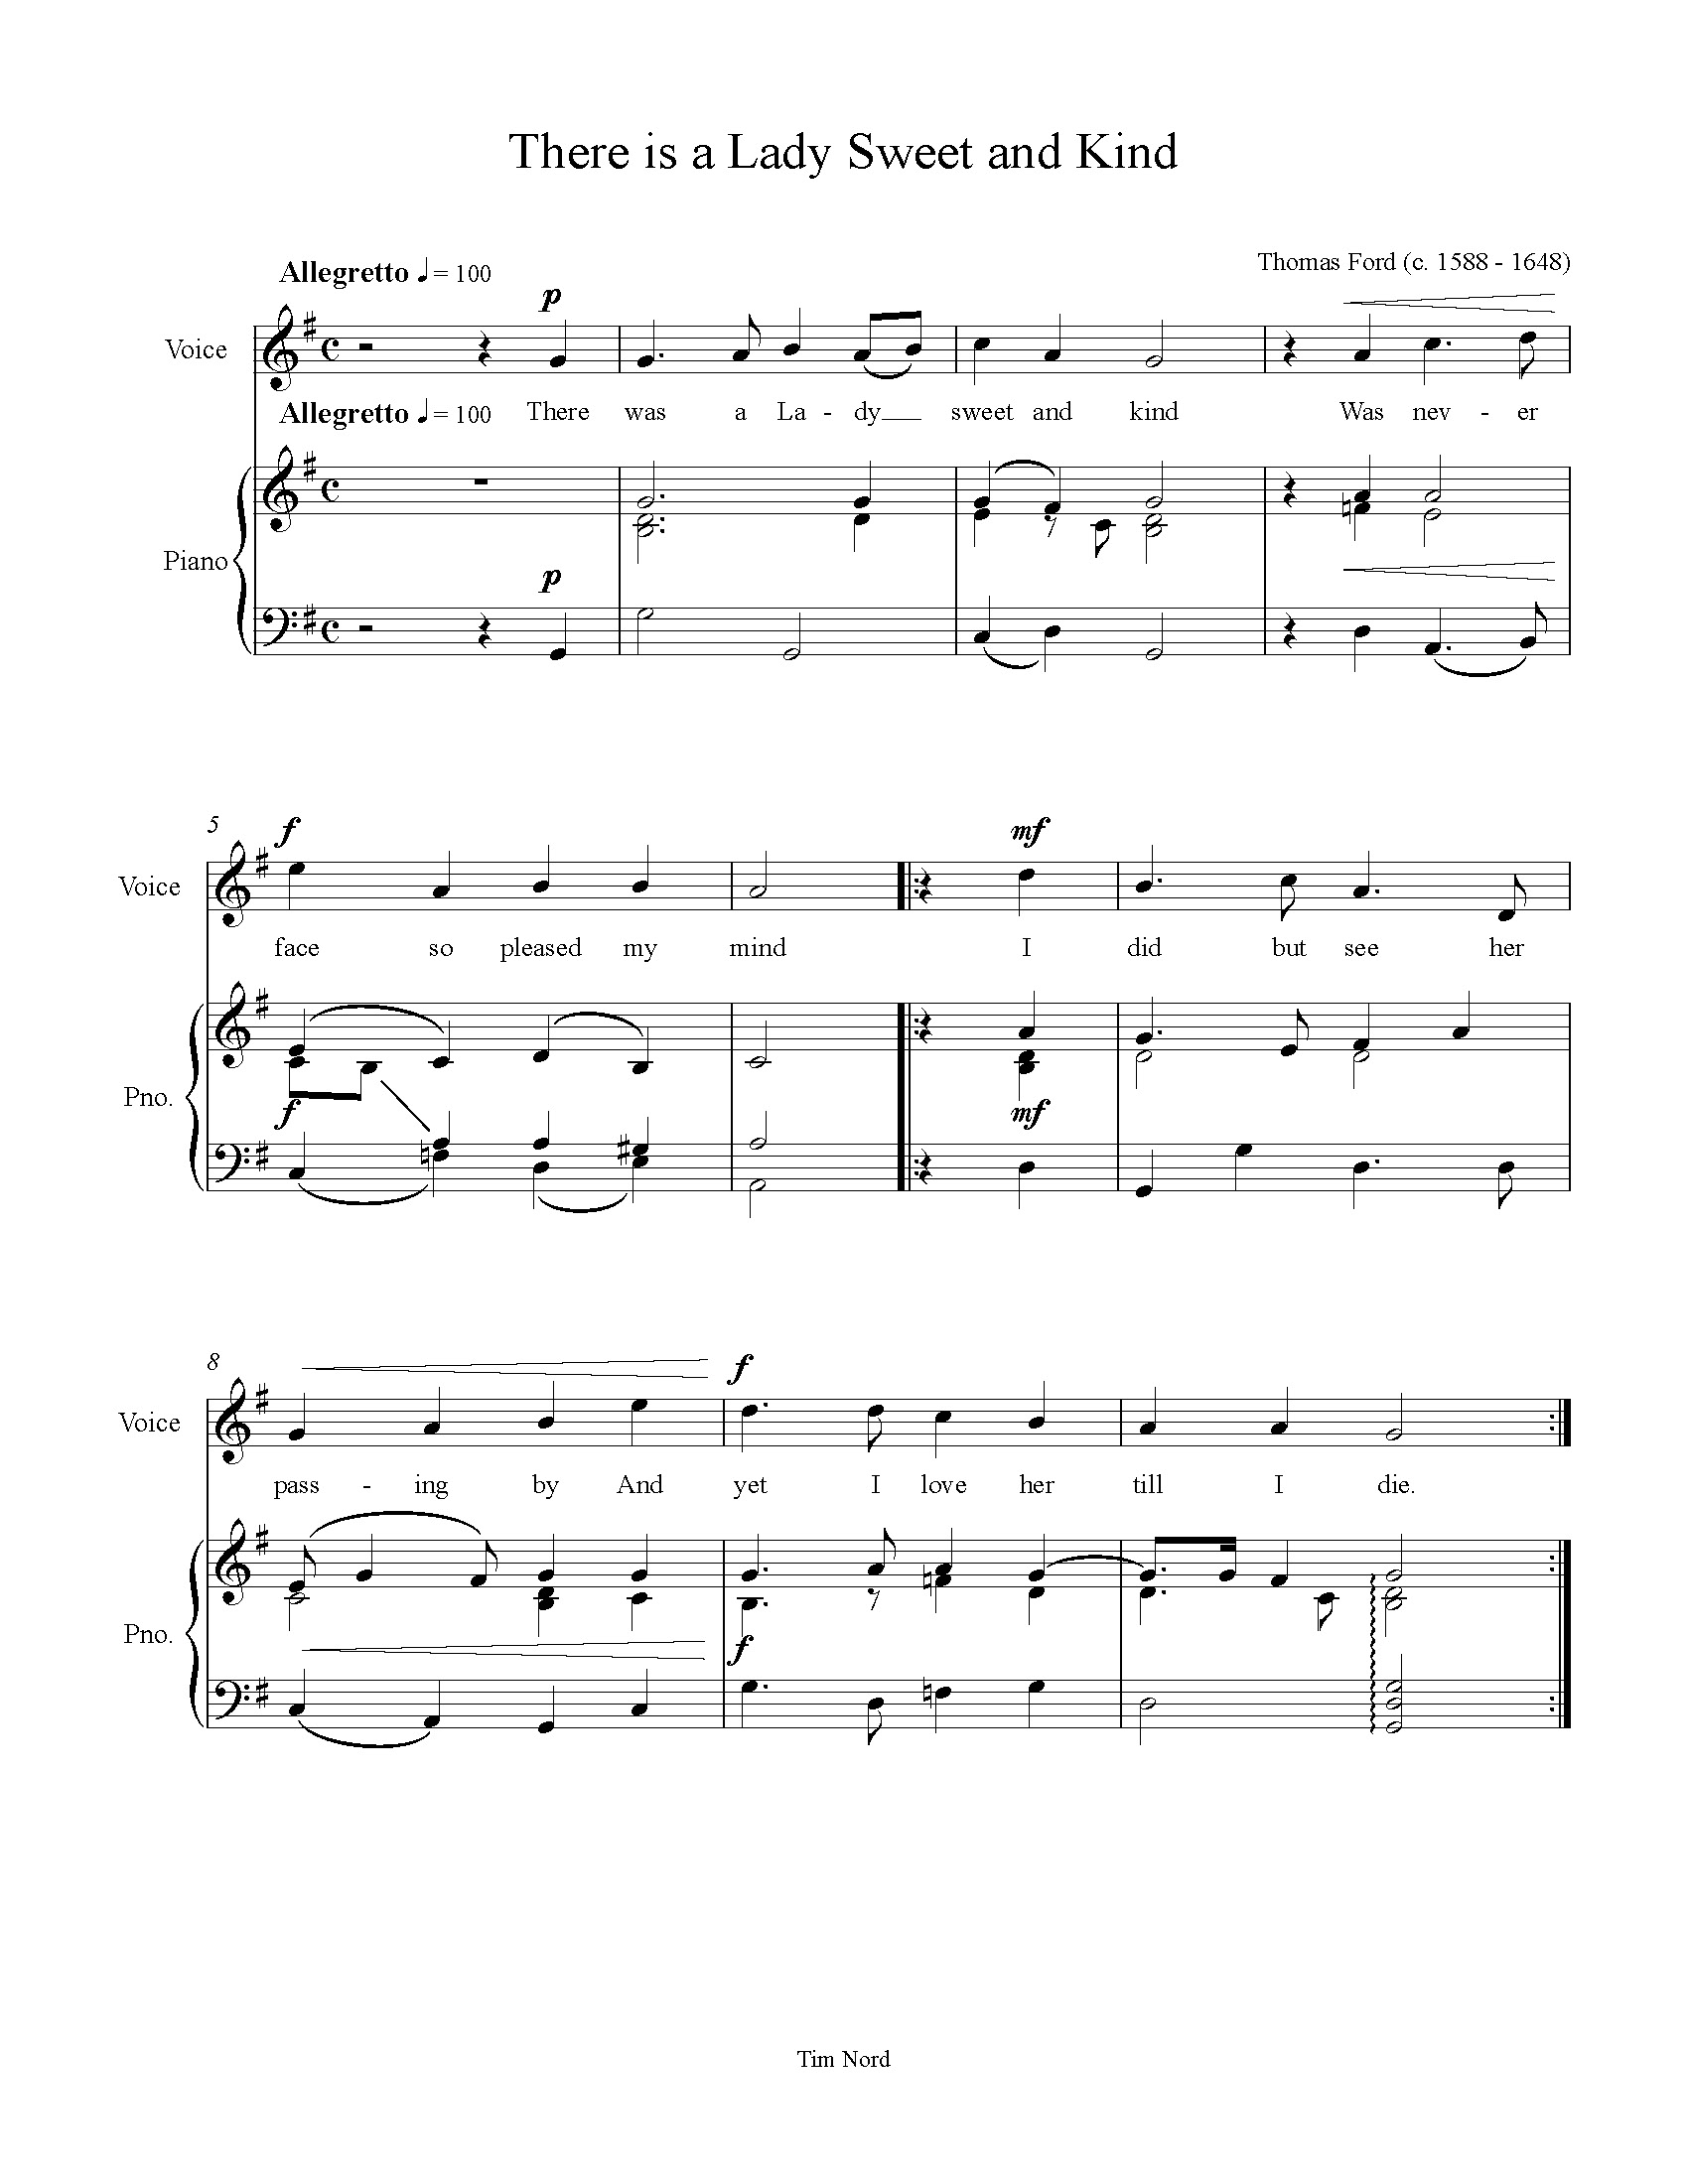
Musical Scores. For this activity you will need a fairly simple score to work with. We have provided a 16th-century song with voice and piano for the illustrations in this tutorial and for your first score entry project. Feel free to branch out from this example with other scores with different instrumentation. The sample score, "There is a Lady Sweet and Kind" (Thomas Ford), is available as an attached file to Assignment 14 in Blackboard.
You will need Sibelius for Macintosh.
Please Note: This tutorial was written for Sibelius 3. Some of the menus may be slightly different in Sibelius 5.
![]()
Sibelius is a music notation program designed to produce excellent
desktop publishing results of professional quality. It uses simple point-and-click
operations for easy note placement, and it provides powerful editing tools
for the manipulation of notes, graphics, and text. Sibelius also
communicates with standard MIDI devices for entry and playback
and it will also import standard MIDI files from other music software.
This project focuses on using Sibelius as "electronic staff
paper" onto which music, graphics, and text are placed by
using the mouse. Sibelius' use of MIDI will not be covered in this
project, but will be done in Project 10.
Project 9 focuses on initial data input and structural issues
in designing the score. In Viewport VII, Module 20, we noted the
importance of proper order in terms of the way you use music notation
software. This project stresses topics in the Note Entry Stage and Careful Editing
Stage. Project 16 deals with printing, MIDI entry and playback, and scanning.
There are several parts to this project:
Run Sibelius 3.0 or later software!
You should not need to change any of these options. Our software should be setup to work correctly, especially with our MIDI hardware!
Be sure to initialize General MIDI on the Roland Keyboards!
The following setup issues are important for both Projects 9 and 10 although most apply to MIDI issues for Project 10. Regardless of which project you do and in which order, be sure to start with the following settings, options, or preferences:
MIDI and Playback
As with any software program that uses MIDI, you need to be sure that the computer is using some sort of MIDI management system. Under Mac OS X coreMIDI and coreAudio are the two primary sound management systems. To check the device settings, launch Sibelius and go to the Play menu, then choose the Devices. option.
The window below will appear. This is the primary setup screen for sound input and output within Sibelius.
At the top of this window viewed here, Sibelius will list all of the Playback devices the Mac OSX system knows about. A M-Audio MIDISPORT 2x2 interface is connected to the USB port on this example. Sibelius shows Port A and Port B for possible output to an external MIDI sound module or other synthesizer. The DLS Music Device is Mac OSX's built-in sound synthesizer or software synth (accessed through QuickTime). This is the Playback option we've chosen here. If you click on a Playback device, you should hear a scale to confirm that it is working. We use the Fastlane USB Port A (or MIDI Keyboard).The lower part of the screen sets up the Input Device. A MIDI keyboard is connected to Port B of the MIDISport. The indicator light is glowing green indicating that the computer senses MIDI messages coming from the keyboard device. MIDI Thru is checked so we can hear what the keyboard is playing through the computer.
Additional Playback Options can be adjusted from under the Play menu. More on this later.
Document
The House Style menu lets you tweak just about any built-in rule that you want to adjust. Notation software like Sibelius has a considerable amount of automation that makes a good attempt at second guessing your notation tasks and making entry as easy as possible. Like any automation system, however, it can get in the way. Many of the settings under this menu give you the option of adjusting or altering notation decisions Sibelius has made. It is optimally customizable!
The Engraving Rule options are but one example. The Engraving Rules lets you fine tune placement of just about any music symbol, graphic, or text. Here you can see the options for "barlines". This is all pretty advanced stuff. The point here is to show you the depth of options that software like Sibelius provides and that you should never feel Sibelius is making you do something you do not want to do.
There are other setup features that can be explored later on a need-to-know basis. The Preferences menu as shown below has several windows of options to investigate.

![]() Activity 1. Explore the various options for setup
and control described above.
Activity 1. Explore the various options for setup
and control described above.
Important note: When using any computer program for
the first time, take a moment to study the way the menus and windows
are designed. We cannot stress this point strongly enough
as you become more computer literate. Many, many questions about
how to do a procedure with a software program can be answered
without even looking at a manual if you understand from the start
just how the program is designed. (In fact, this "intuitive"
nature in the program is a real sign of quality.)
Look, for instance, at Sibelius' menu structure. Below is the list of primary
menus that Sibelius provides, as well as the toolbar underneath for short-cuts
to common tasks.
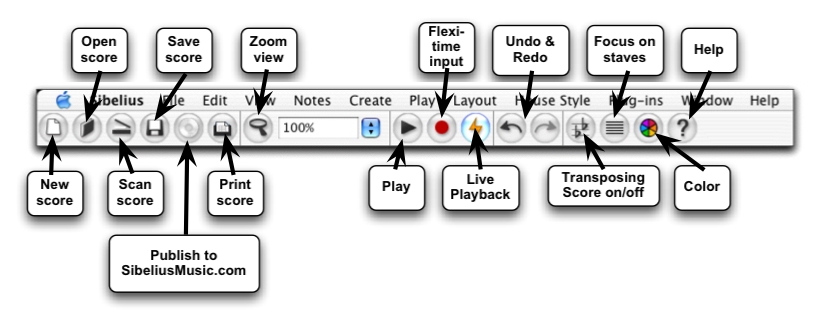
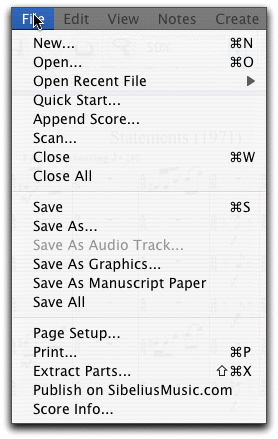
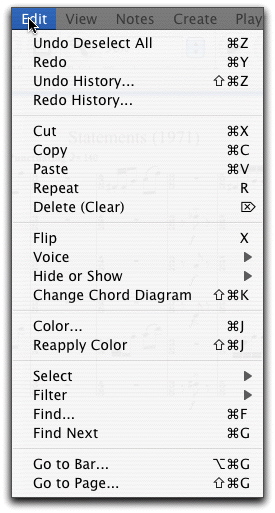
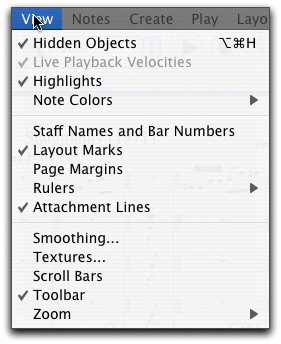
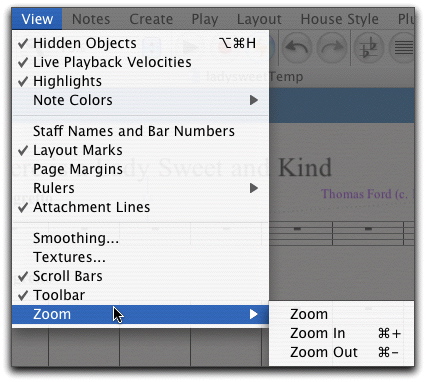
Besides the Play and House Style menus with which we have already worked, check out the others displayed below and in the program itself. The File menu provides the basic features of most software with Open, Close, Save, Save As, Page Setup and Print. Some Sibelius specific features are Append Score, Scan, Save as Graphics, Save As Manuscript Paper, Extract Parts, and Publish to Sibelius' online website for distributing scores. You will observe some redundancy here between the menu and the toolbar above. The Edit menu has the usual Undo/Redo, Cut-Copy-Paste, Delete, Select and Find features. Unique to notation features are Flip (stems), Voice, Hide and Show (voices), Color, Select, Filter, and Go to Bar/Page. The View menu provides options for what you see on the score and score page, how you see it, and some guides for alignment and such. These will take on meaning as you get into a notation project. The Zoom feature is especially useful for changing the perspective from detail close-up views of a complex note passage, to a global view of the layout of an entire page.
 |
 |
 |
 |
 |
 |
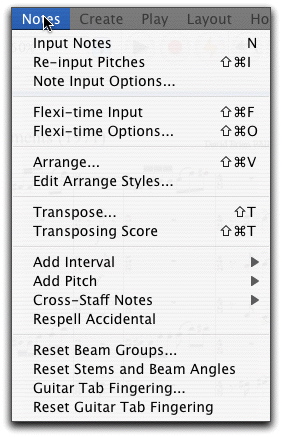
The Notes menu provides a number of choices for transforming
and manipulating notes and note groups (e.g., beaming). Note that many of
the items have cascading menus to the right, indicated by the arrow
icon. These will make more sense to you as you become familiar with the program.
Features like Flexi-time Input, Transpose, and Respell Accidental will be
used a good deal as you get involved with the software. Just remember that
if you need to work with note properties, start here to find what you need.
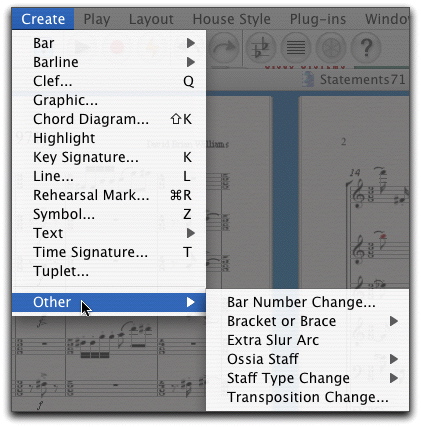
The Create is the heart of the notation program. Here you have access
to most of the symbols you need to put music on the page. Many of these features
are duplicated with some of the tool palettes we will see in a moment.
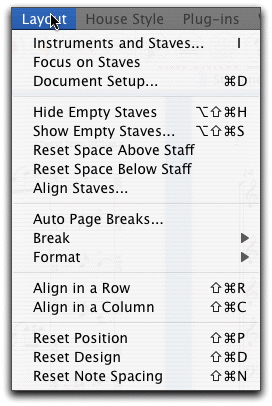
The Layout menu provides options for staves and for score setup,
as well as alignment tools. Here is where you control the overall layout of the
score page.
 |
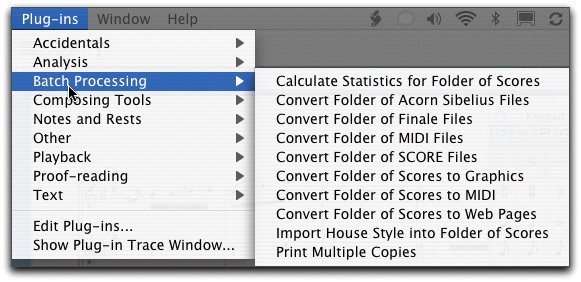 |
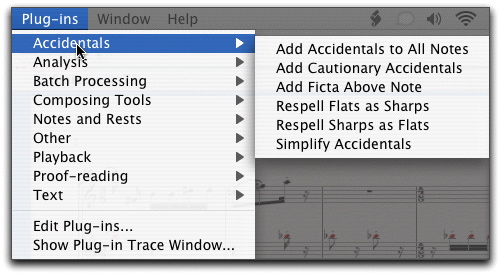
Plug-ins have been discussed in the EMT textbook for most of the high-end music software. Quite simply, the software is designed with an open architecture that lets people write extensions to the software for special tasks. A quick glance through the two lists shown above from the Sibelius Plug-ins menu will give you some idea of the extensive library of extensions available with the software.
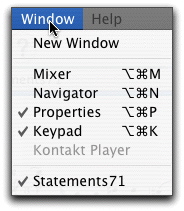
The Window menu provides access to several floating windows that are critical to your use of the software:
Mixer for controlling track assignments, volume, and
panning for audio playback.
Navigator for moving around extensive score layouts.
Properties for fine-tuning
of just about every notational element on the score page.
Keypad for graphic
access to the library of notational symbols.
The current open
score documents you are working with will always be listed at the bottom
of the Window menu ("Statements71" is the file open in
this case).
![]() Activity 2. Browse through the various menus covered
Activity 2. Browse through the various menus covered
![]()
3: Using the Wizard to Set Up a Score and More (return to top)
Notation software like Sibelius provides a "Wizard" to walk you through setting up a score. This is the easy way to do this task. We will set up the score for the Thomas Ford song for voice and piano using the Wizard.
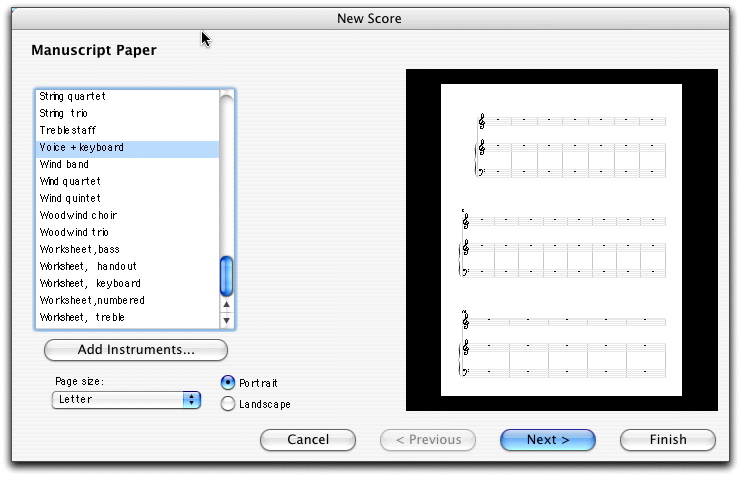
When you select New from the File menu or the toolbar, the Wizard automatically kicks in. The first screen gives you a set of templates to pick from for layout. The Voice+keyboard template was selected. Press the Next button to continue.
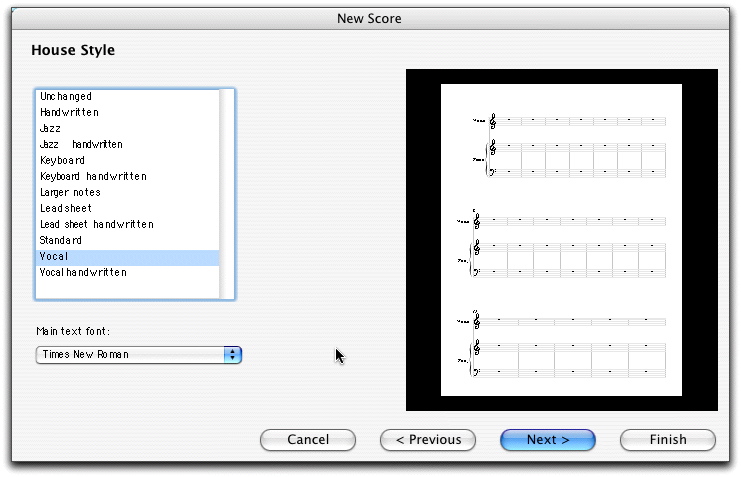
Second screen. The Wizard now lets you pick the "house style" for the layout.
Here Vocal has been selected, we could have also picked "Vocal handwritten"
if we wanted a more casual music font appearance. Press the Next button to continue.
In our version of Sibelius, choose 'Vocal Opus (Times)'.
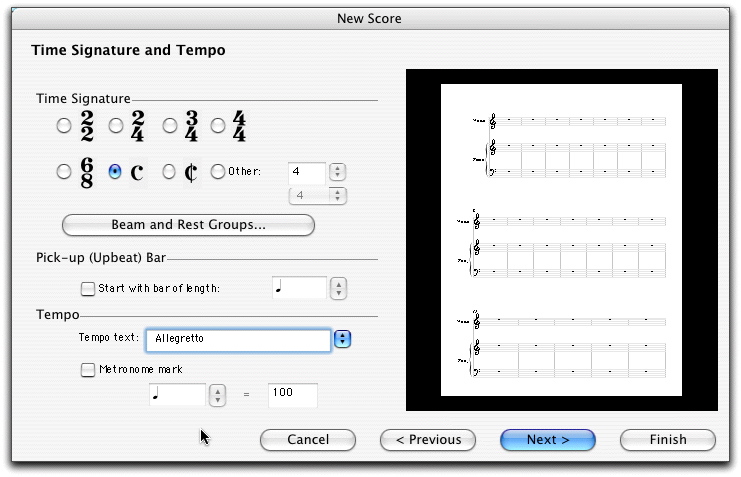
Third screen. Now we need to establish the temporal elements of the layout. Common time (C) has been checked and "Allegretto" has been entered in the Tempo text field. Set the Metronome mark to Quarter note = 100. Press the Next button to continue.
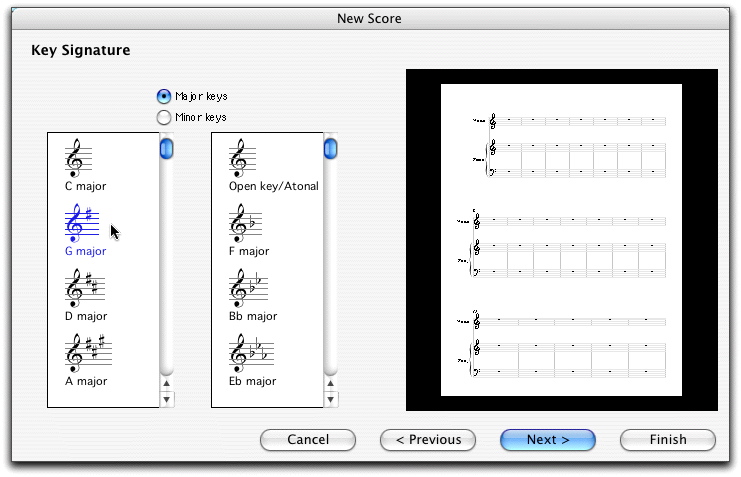
Fourth screen. Now to establish the key. We select G major.
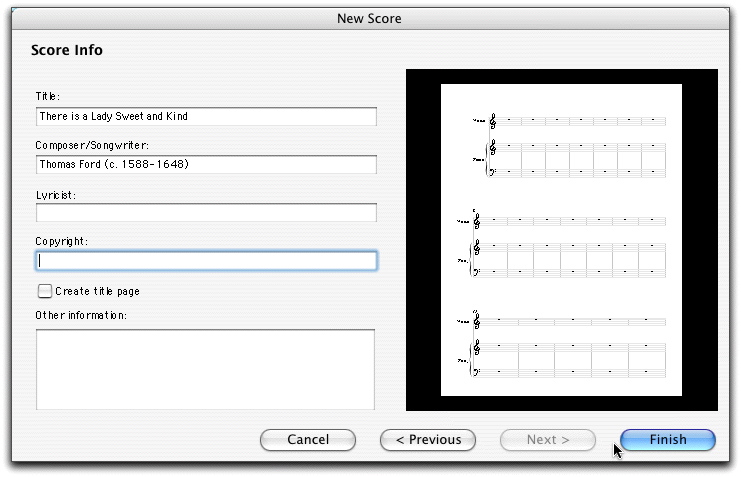
Fifth screen. As you can see, the Title is entered along with the composer information. Click on the Finish button and you are done.
Enter your name in the Copyright line.
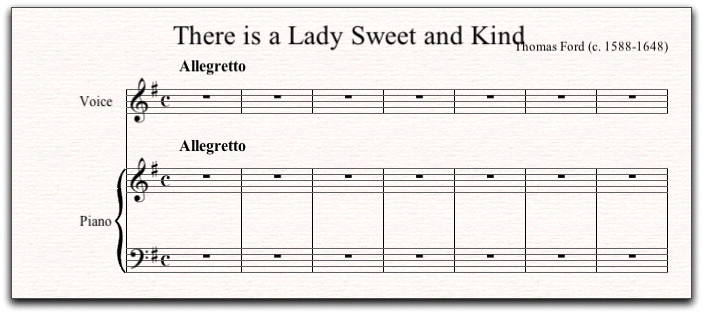
Sibelius generates a score layout for you. It is ready for you to begin entering notes! Everything on the screen can be moved around spatially and tweaked for position. To fix the placement of "Thomas Ford," just click on the text object and move it down a little.
Many Views of the Score
Sibelius offers a lot of options for viewing information about the score layout depending on your needs and the task at hand. Review the View menu again below. Notice the Zoom options at the bottom as well as the short-cut keys for the Apple command key with the + and - keys for zooming in and out. Get to know these well! You will use them many times over.
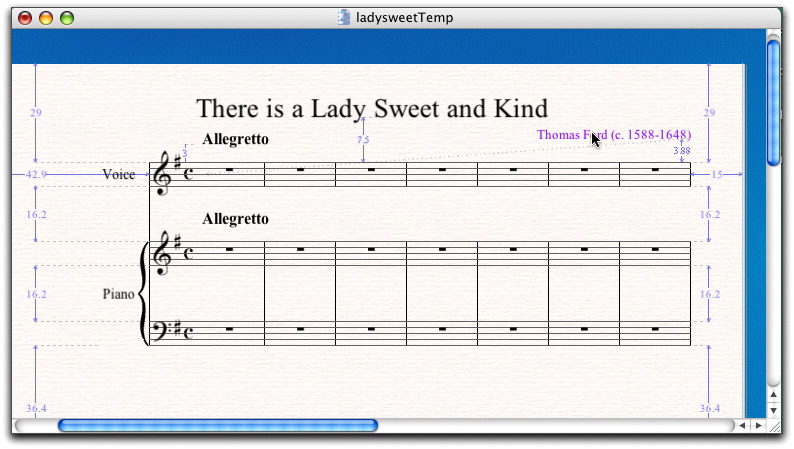
The screen view below has the Scroll Bars turned on. All of the Rulers are active showing specific measures for placement of the objects. The cursor is being used to move "Thomas Ford" down--it is displayed in purple, and you can see the attachment dotted line showing where the object is anchored (notice that Attachment Lines is checked in the View menu).
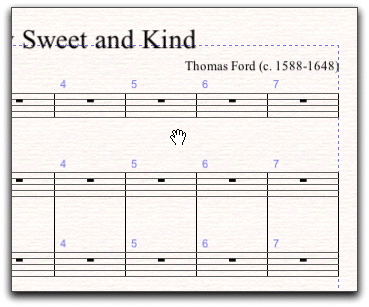
For another view, the hand icon is shown. By holding the mouse button down anywhere on the screen, the cursor turns into a hand that can be used to push the score around to any position for viewing any all parts of the score. For this view, Page Margins and Staff Names and Numbers have been checked (and the Rulers have been turned off) to show another set of visual indicators as helpful aids in notating music. None of these alignment aids will appear in the printed copy of your score.
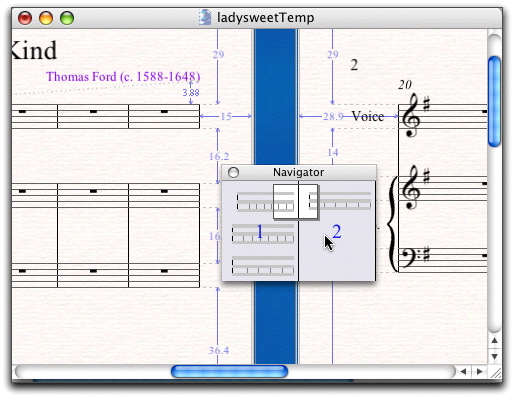
Here we have accessed the Navigator from the Window menu. You can push the small, transparent window around the entire score layout to quickly navigate to any close-up view of a section of your score.
Changing Clefs, Time, and Key Signatures
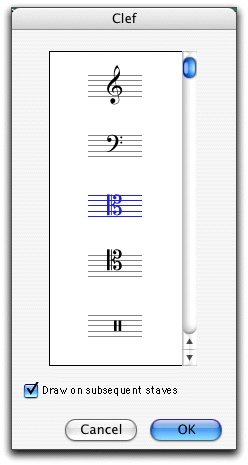
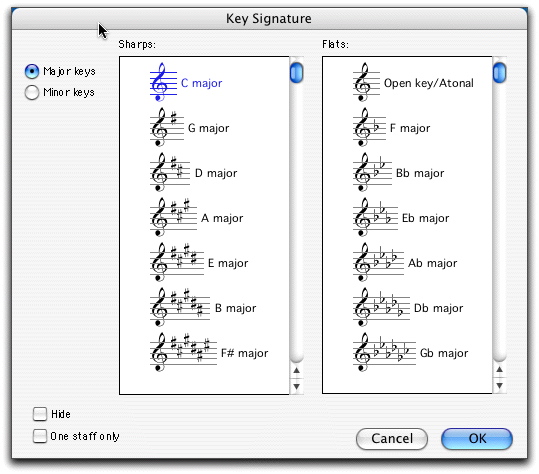
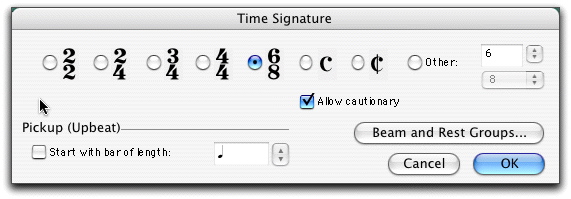
The Wizard set your starting clef, time, and key signatures up for you. Should you need to change any of these in a project, you can do so from the Create menu. Just select the bar where you want the change with your cursor, then pick the option from the Create menu.
 |
 |
Adding and Deleting Bars and Barlines
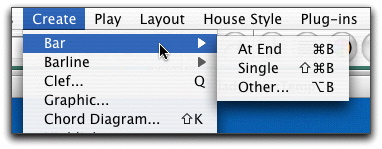
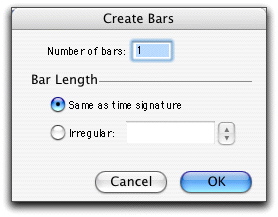
To add a bar or bars (measures), click on the measure where you want to add. Select Bar from the Create menu and then chose At End, Single, or Other. A dialog box will appear asking you how many bars to add and whether to use the same or another time signature. The Barline option will be discussed in a moment when we need to add the repeat barlines for the song.
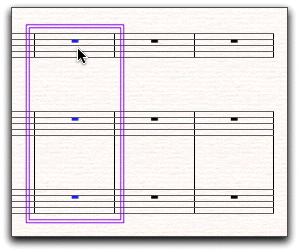
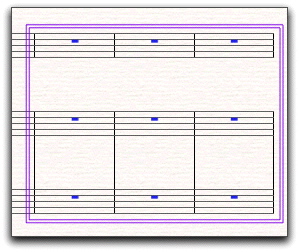
Deleting bars? If you hold down the Apple/Command key and click in a stave, it will select all staves in that measure. Then press the Delete key and that measure will be deleted. If, subsequent to Command+clicking the measure, you hold down the Shift key and click several bars later, it will enlarge the area of the purple, double-lined box. Pressing the delete key will then delete all of the measures enclosed. In the example below, the first screen will cause one measure to be deleted; the second screen, three measures.
Cut, Copy, and Paste
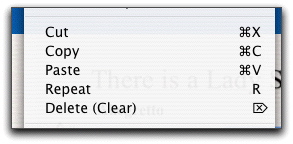 Hint! Cut, copy,
and paste work for music notation just as they do in any
other computer program. Save yourself time and energy by making effective use
of these tools. Music is rife with repetition and sequencing. You can copy
a repeating phrase and simply adjust a few notes needed for a different cadence
at the end, perhaps. You can copy a phrase and then use the mouse to slide
it up a step or two to create a sequence. You get the idea?!
![]() Activity 3 . Time to go to work. Using the sample
song provided, first use the Wizard to set up the layout for the music. Save
your work using the Save option in the File menu or the toolbar. Please
don't skip this step before doing the next practice activity.
Activity 3 . Time to go to work. Using the sample
song provided, first use the Wizard to set up the layout for the music. Save
your work using the Save option in the File menu or the toolbar. Please
don't skip this step before doing the next practice activity.
Then,
explore the various View options as well as adding key signatures and
clefs and time signatures. (Don't save any of this--just fool around to practice).
Finally, practice adding and deleting measures or bars.
![]()
Now it's time to add notation to your score as our final activity in this project. As it was explained in Module 20 of the textbook, there are at least six ways that notation can be entered in Sibelius:
We will cover mouse input here and, in Project 10, we will look at step-time, flexi-time, and scanning. Consider, though, that these are not one-or-the-other choices, but alternatives that you can switch back and forth among as the task demands. Feel free to use step-time input as we have done in class.
We will start by entering just the voice part of the Ford song using the point-and-click graphic tools.
Sibelius Keypad of Palettes
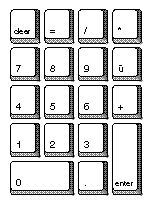 A
critical part of point-and-click note entry are the palettes of symbols,
mapped onto a keypad layout in Sibelius.
At the left is a typical numeric keypad.
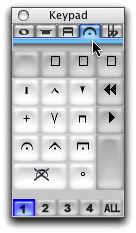
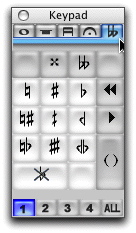
The 5 graphic overlays for the keypad are displayed below. Just clicking on one of the five tabs along the top changes the layout of music symbols.
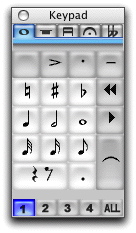 |
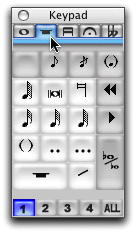 |
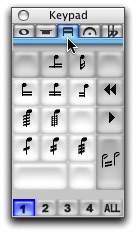 |
 |
 |
To enter the Voice part from the Ford song, simply select the correct symbol on the keypad, and click on the staff to place the symbol. Watch this short video clip to get an idea how this works. Click on the right arrow to play the video. Use the double arrows on the far right of the controller to move a frame at a time for closer inspection.
Warning: In this video, they use a tie where they should use a slur. Do not do this. Use the slur as shown in class.
Notice carefully how the repeat is entered in the middle of measure 6.
Now that you see how it is done, let's summarize a few helpful tips:
 enter-mode enter-mode |
 edit-mode edit-mode |
![]() Activity 4. Now it is your turn to discover how
easy note entry is in Sibelius. Enter all of the vocal line including the ending
repeat barline. Don't worry about the expressive elements. That will come after
we have the notes and rhythms in place.
Activity 4. Now it is your turn to discover how
easy note entry is in Sibelius. Enter all of the vocal line including the ending
repeat barline. Don't worry about the expressive elements. That will come after
we have the notes and rhythms in place.
![]()
5: Notating the Piano Part with Multiple Voices (return to top)

Using the Voice Button. Each staff in Sibelius can accommodate up to four separate "voices." A voice is a set of notated music symbols that represent a single line of music. It is possible, for instance, to enter two voices of music on one staff, with the stem direction for the notes belonging to each line going in different directions. Piano music, like in the Ford song, often uses different voices in a single staff. The voice button controls which voices are being edited in each staff. The four voices are color coded to help you see what notes are going with what voice.
Time to enter the Piano part. This is a little bit like knitting a sweater, if you've ever seen that done. You need to work on one line at a time until all of the pieces start to come together. An important concept to watch for is being aware of what voice, on what staff you are working on. Watch the video below. It shows entering left-hand of the piano part. It is all in one voice.
Remember: You can navigate the movie with the control bar or with the arrows to single step to review or replay any part as much as you want to study this video clip.
Comments: Notice that the notes are blue, indicating Voice 1. Again, click
on the accidental or tie symbols before clicking to place the note.
See how the note symbol seems to stick to the blue arrow. There are no ties in this example except in m. 9. Be sure to use the letter 's' in order to enter a proper slur.
Hint: The shortcut for going back to the graphic keypad to change the symbol every time is to use a numeric keypad. You can use one hand to navigate the mouse, the other to press the corresponding symbol key on the keyboard.
Now watch as we enter some of the right-hand of the piano. For this we will need two voices.
Comments: Notice when note entry switches to the 2nd voice and the note color becomes green. Observe how the chords (two notes on the same stem are entered). In measure 5, the notes cross-over into the left hand. For now, they were entered as if they were in the right hand with ledger lines. An adjustment will be made for that in a moment.
The cross-over in measure 5 is handled by first placing the notes using ledger lines, then telling Sibelius to cross them over to the left-hand. Watch.
| Comment |
Comments: At the beginning of the video clip, the Command (Apple) key was held down as the three notes were selected as a set. Then the cross-over option was applied. The line designating the cross-over will be added later.
The last thing for this step of the tutorial is to add the repeat barline at the end. Select the last barline with the mouse. Then, under the Create menu, choose Barline > End Repeat.
![]() Activity 5 . Now it is your turn. Enter the notes
for all of the music. Use the skills learned above to make minor changes to
the positioning of rests, slurs, and notes where needed. Adjust for the cross-over
notes in measure 5. Use the Play button in the toolbar to play your
music; use your ear to proofread the notes for any mistakes. Then Save your
work.
Activity 5 . Now it is your turn. Enter the notes
for all of the music. Use the skills learned above to make minor changes to
the positioning of rests, slurs, and notes where needed. Adjust for the cross-over
notes in measure 5. Use the Play button in the toolbar to play your
music; use your ear to proofread the notes for any mistakes. Then Save your
work.
![]()
Adding lyrics in Sibelius is very easy to do. The program is smart enough to help pace you through aligning each syllable with the proper note. The Space Bar is used to step ahead for each note.
Lyrics are anchored or attached to note objects. Notice in the movie that the first quarter note G was selected before choosing the Text > Lyrics > Lyrics line 1 option from the menu. At the end of the movie, you may observe dotted purple lines connecting the lyrics to the notes. Objects are attached to notes. We will see that this is true for expression markings and other text as well. Don't misspell the word 'La-dy' like they do. Do not place a dash (-) after 'La-dy', simply press the space bar twice. Sibelius will automatically insert an underscore (word extension).
Watch the video as we add some of the text.
![]() Activity 6 . Enter all of the lyrics. Then Save your
work.
Activity 6 . Enter all of the lyrics. Then Save your
work.
![]()
We have completed the "Note Entry" stage first, as is recommended in Module 20 of the EMT textbook. The next step is the "Careful Editing" stage. Here we need to (a) add dynamic markings, both symbols and text; (b) clean up the score and the alignment of symbols; and (c) review the overall layout of the score on the page.
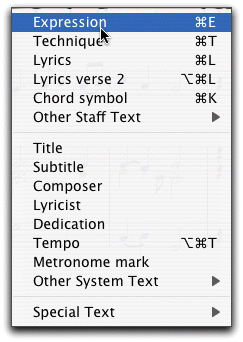
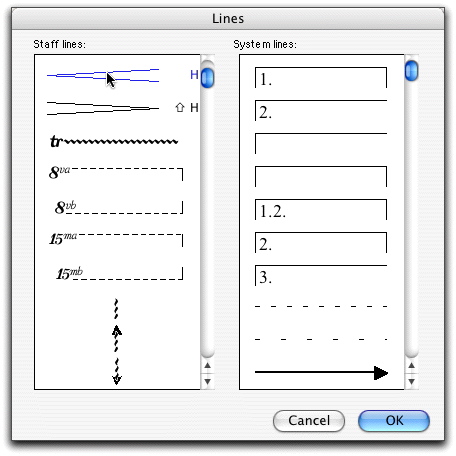
Sibelius provides for adding expressive text markings through the Text option under the Create menu. Adding expressive symbols is done through the Line option under the Create menu. Watch the video clip below to see how this is done for the dynamic markings needed to complete the Ford song. This will demonstrate adding a crescendo, adding a forte (f) dynamic marking, flipping slur markings, and adding the cross-over line in measure 5. The pop-down menu of dynamic text markings is accessed by holding down the Control key while clicking in the edit space (or right clicking if you have a 2-button mouse). Do not just type in the letter for a Dynamic marking. You must use the menu as demonstrated here.
The arpeggio mark on this last chord is also done with the Line option. Watch this short demonstration. Notice, to repeat the point, that all expressive markings are anchored or attached to an object, more than likely a note object. Select a note and then add expressive text or symbols! You only need to enter one arpeggio mark and stretch it up the length of the chord.
Now it is time to see how to fix some places where notes need to be realigned
and extra rests need to be hidden. Watch the video clip to get the idea how
this is done. Here is demonstrated hiding a quarter note rest, realigning an 8th
rest, and adjusting the placement of slur markings. Be sure you do all the hiding and realigning necessary. You should not need to adjust any slurs if you entered them correctly. Sibelius will handle that for you.
Page layout is the last of the careful-editing features we will attend to. Sibelius is very intelligent about layout and will automatically adjust a page of a score as needed. Look for the Layout > Document Setup menus. For a good demonstration of this, try a change in the page alignment from Portrait to Landscape or the page size from Letter to Octavo.
Here are a few tips for making manual adjustments to layout:
Delete extra bars left over at the end. Command+click
inside the first bar you don't need, then Shift+click on the final bar you
don't want. A double purple box should be drawn
around the measures to be deleted. Then press the Delete key. Double
clicking the same procedure will select the entire stave.
There are many more layout features for you to experiment with including the
House Styles menu we noted early in this tutorial. If Sibelius is making you
do something you don't want, do not despair. There is likely a setting some
place that will turn off Sibelius' layout and let you set your own.
Format the page so it looks like the handout you printed from Blackboard. Be sure to spread the staves out so they cover most of the page.
Time for you to finish notating the Ford song, if you haven't already.
![]() Activity 7. Finish notating the Ford song score.
When you are done it should look identical to the score shown below. Feel free
to consult the online Help within Sibelius or seek out the manuals until you
accomplish all that you need to do. Print out the score using the Print option
under the File menu or on the toolbar.
Activity 7. Finish notating the Ford song score.
When you are done it should look identical to the score shown below. Feel free
to consult the online Help within Sibelius or seek out the manuals until you
accomplish all that you need to do. Print out the score using the Print option
under the File menu or on the toolbar.
Project 9 is completed. Congratulations!
When you are finished, submit the Sibelius file (yourEmailFord.sib) by attaching to Assignment 14 in Blackboard. You also need to turn in a printed copy of the page.
![]()
Sample Score (return to top)
![]()